Inspirations

Inspirations
The color you see is the color you get!

Monday, December 31, 2012

Happy New Year's Eve day


Hi Everyone,

 This is DIANA L. From DL.ART with an extra post day here at Creative Inspiration paints, I am sharing with you a New Years Eve decoration.  I want to wish you all a happy, healthy and prosperous  New year


I cut the star out of textured core'dinations card stock from a Tim Holtz Sizzix die  formed it, then painted it with the gold creative inspiration Paints.


The banner is from Enjoy the seasons Imagine cartridge. I cut the numbers from George and basic shapes and then painted them gold as well.

Looks like I have my first ornament made for next year.


Also here is a reminder for the
Anything goes challenge  for a chance to win some CI paints, If you use CI paints on your projects you will get two entries. The competition is randomly drawn. So everyone has a chance you will have until Saturday Jan 5th to link your project up.


Today is the last day to take advantage the sale


Creative inspiration paints is having a 10% off sale
until January1, 2013


Have a blessed day, Diana

Sunday, December 30, 2012

CI Paints Inspired By: Anything Goes

Thanks to all those who joined in our "Merry Christmas" challenge, 
we enjoyed all your wonderful creations!
 Check the post below to see the
  Random.org Top 3!
 ---------------------------------------------

This week's challenge and the final one for 2012 is:
Inspired By: Anything Goes
Here's some inspiration:
With the new year days away I thought for today's inspiration I would make a 
festive New Years card
but before I share my card, on behalf of myself and the entire Creative Inspirations Paint DT we want to wish you all a VERY Happy New Year!
Thanks so much for all your participation in our challenges and hope you will join in our last challenge for 2012
Now for my project!


I love the fun colors of this card...the black white and gold and when I think of the New Year...the first thing that comes to mind is the countdown....3...2...1~ Happy New Year!

 
Most of my card was done with heat embossing and my favorite
embossing powder~ Deliquesce Black and Deliquesce White
I also added some Deliquesce Gold Crystal as well...LOVE how this added such sparkle and texture 
to my calendar
For the arrows on the clock they were originally white and black but to make them stand out alittle more I painted them with Gold CIP...

Diana is joining us again this week...here is her beautiful card
For all the details on her project head over to her blog
DL.Art

I hope you have enjoyed our projects and will play along with this week's challenge!!
Remember you do not need to use CI Paints on your projects but if you have them we would LOVE to see how you used them!!
As always thanks for stopping by and
Happy New Year! 
See you all in 2013
~Jessica~
---------------------------------------
General Challenge Rules

Each week you will be given a challenge to find inspiration in/from what ever the challenge theme is... you can be as literal or abstract in your inspiration as you want....Just make sure you can tie it back to the theme! Challenge closes at 6:00pm Eastern on Saturday.
You will always be able to jump back to the current challenge by clicking the "Current Challenge" link in our sidebar. The rules can always be found by clicking the tab "Challenge Rules" at the top of the page.
You do not need to use the Creative Inspirations Paints in your project, however, if you do, tell us which colors you used, and your name will go in the drawing twice! Each month, one person will win 5 jars of paint in the colors of their choice. The winner will be randomly drawn from all the people who have played that month, so make sure to join in on our challenges each week!
---------------------------------------------

Random.Org Top 3 Inspired By:Merry Christmas

Thanks to those who joined us last week for our
Inspired By: Merry Christmas challenge! 
Here is the Random.org Top 3:
#29~ Mandy


 #1~Elizabeth


 #24~Shea

  Beautiful work ladies!
You each will receive an extra entry in our December drawing for some CI Paints of your own!
You can grab this badge for your blog:

Friday, December 28, 2012

My Last Ornaments for 2012!

 
Happy Friday Everyone!
I have 2 wooden Christmas ornaments I decorated
for the last ones for 2012!
I love these intricate design ornaments you can
find in the craft stores! Love how you can use Creative Inspirations paints to add so much shimmer and color!!    
 
 
         A close up of all the fun colors and shimmer are below!
I added glossy accents over the berries and dripping wax.
To add a antique look to the frame I added glossy accents and let is dry most of the way and then added the antique Gold. You can see in both picture how you will get some dark and light areas, I love this look!
For the flame on the candle I used a darker yellow color called Buttercup and the base I used Sunshine. Emerald green was used for the leaves and Burgundy for the Noel. For the berries I used Garnet and I also added a little Gold on the edges of the ribbon.

 
A close up of the colors!


For this fun wooden shaped ornament I decided to have fun with chevron stripes! I first used Deliquesce embossing powder in Super Sparkle Green for the sentiment a stamp I used. ( To, By, & From) Love this color green so pretty and lots of sparkle! For the chevron stripes I used
Gold and Silver Frost.
I hope I have inspired you to try CI Paints on wood projects!
The CI paints are on sale now until Jan. 1, 2013!
Close up of the colors are below!


I will be back next Wednesday to share a Happy New Year Card!
I hope you each have a safe New Year!
Have a wonderful weekend!
Blessings, Michelle

Thursday, December 27, 2012

CIP - Family Christmas Wishes

Hello there Creative Inspirations Paint fans!  I hope that you're all enjoying this holiday season in whatever way you choose to celebrate!

This sweet little gal is from Whimsie Doodles, such a cute image!  I've colored her in Copics and went over the pink with Creative Inspirations Paint in the Pink Highlights, and the white under the 'fur' in Winter Frost.  I've cut a paper doily in half and sprayed it with glimmer mist, the flowers are IAR, and the pretty crocheted piece behind the largest flower was done by my Mom.
Here is the Creative Inspirations Paint used:
Thanks so much for stopping by!

hugs
Kimberly

Wednesday, December 26, 2012

Highlighting Patterned Paper


Happy Holidays CIP fans!  Dana here today sharing a Christmas layout. I hope you all are enjoying your holiday with family and friends.  I had a great time accenting this page with Creative Inspirations Jeweled Inspirations and paint.


The Small Siam Jeweled Inspirations were the perfect size to highlight the holly berries on the patterned paper.


I added sparkle to several areas of the paper using Emerald paint and the patterned paper as a guide.


 Thanks so much for stopping by today!

Tuesday, December 25, 2012

Merry Christmas- Everyone


Wishing you and your family a very Merry Christmas!

This is DIANA L. from DL.ART , and seeing as how it is Christmas day.
I am sharing the original meaning of Christmas and How I used these amazing products.
for the whole piece I used the Deliquesce gold crystal embossing powder and the deliquesce black embossing powder. The black came out very shining raised and thick


Here is a close up.


I used the GOLD CRYSTAL around the edges of  the design also.


here is a close up of the GOLD SPARKLE-- and it really does sparkle.
As you turn it it is almost like a hologram- you can see all the different colors in it.
Creative inspiration paints is having a 10% off sale on their paints through January 1, 2013

Products used:
Ribbon from my stash
PTI Kraft card stock
stamp: come to Bethlehem SU
Big boss: emboossing pad
Creative inspiration Paints:
Delequesce black
Delequesce Gold Sparkle

Thank you for stopping by, and have a very blessed Christmas, Hugs, Diana

Monday, December 24, 2012

A Joyful Canvas

Good morning and Happy Christmas Eve to everyone! I hope you are all ready for tomorrow and are able to spend some quality time with your loved ones and friends. 

I wanted to make today's post quick since everyone is preparing for the big day tomorrow, or already in the middle of some festivities! 

Today's project is a canvas I made for my boyfriends mom, Joy. She loves Christmas, and has one of the most beautifully decorated houses I have ever seen! Since her name is Joy and ornaments and decorations with the word Joy are in abundance this time of year, she has a tree decorated entirely with Joy ornaments. Also, there are various pieces of art around the home that have the words Joy on them. Which is why I made this canvas. The Joy isn't just the word joy, it is Joyeux Noel. We don't remember her having many French phrases around the house, so I thought this would be cute. 


As you can see it has lots of Creative Inspirations Paint on it. The background, tree, tree trunk, and tree top are covered in CIP goodies! There are even some jewels on the Joyeux Noel. 


I used the following paints and jeweled inspirations on the canvas: 


Thank you so so much for stopping in today from your busy schedule!! I will see you again after the New Year!!! 

Merry Christmas!!!! 

If you would like to get some paints before the start of the new year, remember that everything in the CIP store is 10% off!!! 


Sunday, December 23, 2012

CI Paints Inspired By: Merry Christmas

Thanks to all those who joined in our "Christmas Gifts" challenge, 
we enjoyed all your wonderful creations!
 Check the post below to see the
  Random.org Top 3!
 ---------------------------------------------

This week's challenge is:
Inspired By: Merry Christmas
we want to see all those last minute Christmas cards, LO's gift ideas....
really anything Christmas related :)
Here's some inspiration:
Using the adorable Bugaboo Stamp~ Ava Christmas and Creative Inspirations Paint
in Green Olive and Rustic Red along with my favorite glitter~
Resplendence Angel Dust
 I made one of my final Christmas cards for 2012
Here is what the completed card looks like...

Diana also has a card to share...
Isn't this adorable??
For more details on her card head on over to her blog

I hope you have enjoyed our projects and will play along with this weeks challenge!!
Remember you do not need to use CI Paints on your projects but if you have them we would LOVE to see how you used them!!

From myself and the entire Creative Inspirations Paint DT we wish you all a very Merry Christmas!
As always thanks for stopping by and
have a great week!
~Jessica~
---------------------------------------
General Challenge Rules

Each week you will be given a challenge to find inspiration in/from what ever the challenge theme is... you can be as literal or abstract in your inspiration as you want....Just make sure you can tie it back to the theme! Challenge closes at 6:00pm Eastern on Saturday.
You will always be able to jump back to the current challenge by clicking the "Current Challenge" link in our sidebar. The rules can always be found by clicking the tab "Challenge Rules" at the top of the page.
You do not need to use the Creative Inspirations Paints in your project, however, if you do, tell us which colors you used, and your name will go in the drawing twice! Each month, one person will win 5 jars of paint in the colors of their choice. The winner will be randomly drawn from all the people who have played that month, so make sure to join in on our challenges each week!
---------------------------------------------

Random.Org Top 3 Inspired By:Christmas Gifts

Thanks to those who joined us last week for our
Inspired By: Christmas Gifts challenge! 
Here are the Random.org Top 3:
#5~ Lindsey
Homemade gifts, Xmas chutney

 #15~Jenn


 #10~Donna


  Beautiful work ladies!
You each will receive an extra entry in our December drawing for some CI Paints of your own!
You can grab this badge for your blog:

Saturday, December 22, 2012

the link to charms...

Hello my wonderful friends. I'm glad to see you survived the Mayan end of the world. =)

Why is it that when you are stress and strapped for time, the store never has what you need?

This week I was in desperate need of charm blanks to make bookmarks with. I made a whole bunch months ago for the kids in my church, but we found out we were about 10 short to finish out the year. Yikes!  I went to my local variety store in hopes that they might have something... They have in the past, so it wasn't too much of a stretch. Of course, because I needed it, they didn't have it. One of the drawbacks to living out in the middle of no where is that major craft stores are quite a drive away. So, I was forced to get creative.

So today, instead of sharing a technique that I am familiar with, I will take you along for the ride as I figure out how to make charms from chains.  I was making this up as I go and taking pictures in hopes that it wouldn't be a total flop. LOL!

I was able to find this large link chain at the store and decided it was my best hope for making a workable charm....


I began by separating the links.
(I was pretty sure that would be a safe place to start. LOL!)


I wanted a back to my charm that could withstand the abuse of daily use, so  I decided to stamp my image on some acetate with StazOn ink.... It was amazingly hard to find images to fit in these particular links because they are narrow... I ended up using just a small portion of an image.


Next I put a tiny bit of Glossy Accents (by Ranger) on the back of the link and centered it over the image. I ended up putting an acrylic block over it to weigh it down as it dried to make sure it made a good seal.


Once the seal was made, I filled the whole thing up with Glossy Accents. I then set it aside to dry overnight. Talk about a hard wait! I didn't know if it would work or if I should keep trying other options, so I tried a few other things just in case...  (UTEE is not a good option... it cracked when I dropped the link.  Paper worked ok, but I didn't like the back... I'll share a pict at the end of the post anyway.)


In the morning it was clear and dry, so I started cutting it out. To my dismay, when I was half way through cutting it out, the acetate peeled right off!   I was about to throw in the towel at that point but then I noticed that the StazOn ink had transfered perfectly to the Glossy Accents! And it didn't scratch off!  I suddenly realized that discovery in of itself could lead to some interesting projects!

(I love it when things don't go as you hoped, but end up being better!  You can discover so much if you take the time to experiment!!!)


Ok, so here was the part I was most concerned about... could I punch a hole in it without ruining it???? I honestly had no idea.  I crossed my fingers and tried.

Turns out, you can. =)  *whew!* 


the result... a clear charm!!! Yay!!!

Now to add some color...


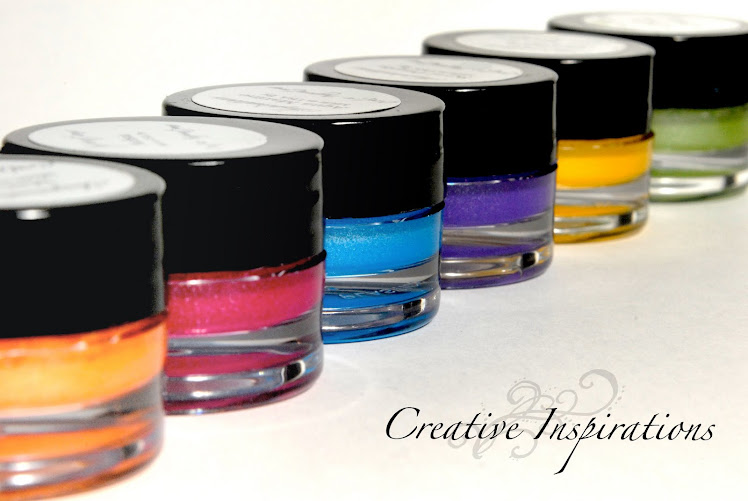
Non-pourous surfaces are hard to add color to. Water based products just won't work. Alcohol inks work, but they would react with the StazOn ink and smear it. So my first idea (and favorite!) was to use Creative Inspirations Paints.  It worked like a charm. (ok, so that pun was lame, but when I first thought it, I wasn't trying to be funny.... it made me laugh when I noticed what I had just said. LOL!) I added the paint to the back of the charm. That way the black outline would not get covered.


Success!  I'm really glad it worked! Now my brain is a whirl with ideas of how to mix it up... What about adding Resplendence to the Glossy Accents? Or swirling Creative Inspirations in it.... Or...or...or... Guess who's going to be playing with charms! =)  
(if you have any great ideas for this, I would love to hear them!)


So here is the finished book mark.  I really love these shepherd's crook book marks!  They are fabulous!  I had a hard time finding them in bulk for a good price, so here is a link to the place I used. If you only want one or two, you can try ebay or esty.


Here is one of the other experiments that worked...


I painted a piece of cardstock with Creative Inspirations Paint, then stamped the image on it. I then did the same thing I did with the acetate (filling it up with Glossy Accents...)  It looks great from the front, but I didn't like the look of the paper on the back. However, if you were going to glue this to a card or LO, it would look fabulous!

I must say, I am very glad this worked!  Thanks for coming along for the ride. I hope you all have a safe and "charming" holiday/end of the year!  (yes, another bad pun.... I just couldn't help myself! I think I need more sleep.)

Enjoy!