Inspirations

Inspirations
The color you see is the color you get!

Saturday, April 30, 2011

disappearing act...

Welcome back everyone!

Want to learn a magic trick? 

They say a true magician never share their secrets, but since I'm no good at normal magic tricks, I guess that rule doesn't apply to me. =)


Have you ever spent hours working on a project, then while adding the finishing stamped flourishes, the stamp slides and you get a blurry image-- completely ruining your project? Or maybe you love the popular collage look but are hesitant to try it because you aren't sure exactly how to layer your stamped images? Or maybe you have run into the same problem I had while working on my mini album.... The front of the page is so textured and dimensional, that there was no way to get a clean stamped image on the back...

 Well, if you have ever run into any of these problems, here is one solution you may want to consider... use tissue paper. That magical cheap stuff you get for wrapping gifts, is a great way to solve these problems. 

What you need:
Tissue Paper
Stamps
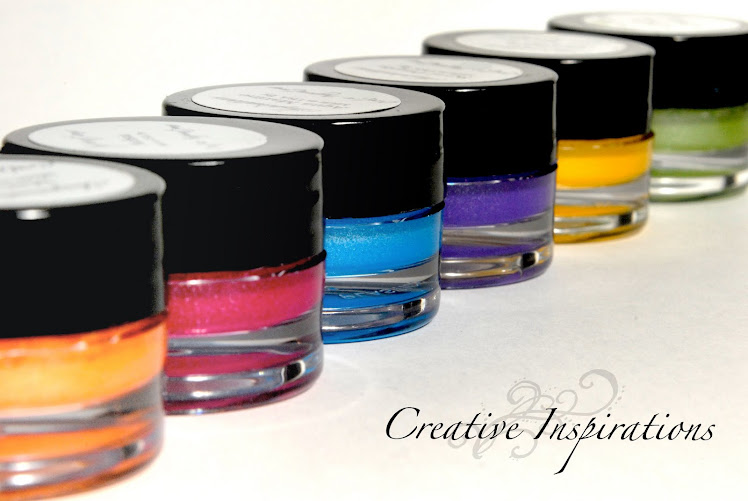
Creative Inspirations Paint (cuz we love the shimmer!)
Clear Liquid Glue/ Decoupage Glue
Paint brush


For my mini album, I wanted "Silver Frost" swirls, but for easier demonstration viewing, I went with "Aqua Marine".
Step 1: Ink up your stamp (of course, for the fabulous sparkle effect of the CI paints, I suppose I should say "paint" up your stamp. LOL)

 Step 2: Stamp onto white tissue paper. 

 Step 3: Trim around your stamped image.  It doesn't need to be exact, but you don't want too much extra paper to try to deal with later.

Step 4: Decide on placement... Here is where you can move the stamped image around to find exactly where you want it. Because of how thin tissue paper is, you can see through it somewhat to give you an idea of what it will look like in the end. (always nice for those who work better visually than picturing it in their head)

 Step 5: Using a paint brush start applying glue over the tissue paper. Start in the middle of the tissue paper and pull the brush outward past the edges. Make sure you go past the edge of the tissue paper to ensure a good seal of the edges.  The glue will seep into and through the tissue paper. As this happens, the tissue paper will become fragile, so don't over work the glue, but you can use your brush to gently work wrinkles out to the edges.

Step 6: Allow to dry.. As you can see, once the paper dries, it becomes nearly invisible, leaving you with a fabulously stamped image in the exact spot you want despite the dimension on the other side of the page.  Nice little magic trick to keep up your sleeve, huh!

So, here is the finished back side of my mini album cover.

You can see how well the shimmer shows up on the swirls! 

A couple of things to note:
-If your glue has a glossy finish, you may need to cover the entire background with glue so it is all glossy instead of just patches... If your glue has a matte finish, you probably won't have to worry about that.
-Keep in mind that this technique works better on some surfaces than others... when in doubt, do a test on a similar surface that you don't care about.
-Be sure to wash your stamp and brush thoroughly after to avoid ruining either!
-You can also use this technique to get a mirror image of your stamps!

So, is the hand really quicker than the eye?  I have no idea, but hopefully this trick will help you in your creative journey!
~Kassi

Friday, April 29, 2011

Thanks!

Thank you to all of those who you took the time to respond to our polls and share your crafting insight! The info you shared will help us bring you fabulous new things! Please feel free to contact us with any ideas or suggestions you may have at anytime, we love to hear from you!
~Kassi

Thursday, April 28, 2011

Shimmery Pink Floral Collage


It's Holly posting today! You probably know by now that I am totally in love with all the collage stamps over at I Brake for Stamps. This one is no exception. This lovely Fleur Hydrangea Collage is colored with the Pencilled Twinks technique from Technique Junkies, and I added some little white pearls to the centers. The blue around the flower is done by simply sponging some blue ink around the edges of the collage.

I morphed the Pencilled Twinks technique by using Tutu Pink Creative Inspirations Paint. You can see the gorgeous shimmer here:


I hope you have a wonderful day!

Wednesday, April 27, 2011

Last 2 cards - vintage kit - Kianel

Hello,
Kianel here with you today! Here are the last 2 cards i made with the vintage kit i designed here in France with Creative Inspirations Paints in it. There is a card with hidden tags and a star shaped card for which you can find a tutorial here.
All the dies used are from Cheery Lynn Designs, Quickutz and Magnolia, papers from Graphic 45, inks are distress, CI paints are "fairy dust" "winter frost" "mango" "garnett" "emerald""chocolate", Tilda stamp is from Magnolia, sentiment stamp is from Infinimentscrap.fr, butterfly is from Martha Stewart.


And here is the star shaped card which step by step you will find here.


That's all for me, don't forget to pop by everyday to see the marvellous creations of my dt mates and to join our challenge every sunday!
Love from France, Kianel.

Tuesday, April 26, 2011

dream cover...

Hey everyone! There was a last minute emergency, so I'm here filling in.. Hope you guys don't get too tired of me. LOL!

Today I thought I would share with you the cover of a mini album I'm working on. 
The chipboard was first covered with a layer of gesso. I then added a thin layer of modeling paste.  I stamped into the wet paste to give even more texture. Once that was dry, I covered the whole thing with Light Purple Creative Inspirations paint. I then used my finger to rub on some Royal Purple CI paint to highlight the texture.

 "dream" was stamped onto canvas with Turquoise CI paint. I love how the texture of the fabric shows through... (can you tell I like texture? LOL!)

 The flowers were done using the faux plastic technique using Sunshine, Tickled Pink and Sky Blue CI paints. (these colors are so bright and happy!)

Each butterfly was stamped twice on acetate, then cut out. When layering them, I only put glue on the body so the wings would move and add dimension. 
(can you see some of that great texture behind the butterfly?)

Have a wonderful day everyone!

Monday, April 25, 2011

It's Time to Bloom


Hi there. Did you have a nice weekend? With the long-weekend behind us, let's begin another one by using Creative Inspirations Paint. All of the orange is painted up with CI paint. Along the bottom of the skirt and inside of the bow, I painted using a CI paint stick. Then, I used my artist paint brush and blended my orange on the collar and on the dress. I love to use my chisel-end brush. CI paint works beautiful with each method of painting.
In my background, I sponged a sky and then added grass. Secret trick: use a winter icesicle punch and turn it upside down ;)
My background is called the Dry Embossed Wash technique.


Here is a close-up where you can see the sparkle and shine from the Creative Inspirations Paint. Opps, that's not a mark in your screen, it is actually a little bit of glue. After my project was coloured and painted, I went to glue on my butterfly and left a little bit of glue behind. You don't have to do the same--LOL.

Don't forget to come back tomorrow for more creative work from The Creative Inspirations Paint Design Team.

Raggedy Anne is a digital image from Sweet and Sassy Stamps. Sentiment is from Stampin' Up!

Thank you for stopping by!


Sunday, April 24, 2011

CI Paints Inspired By: The Rainbow

Thanks to those who joined in our challenge last week! We loved seing your "Egg" inspired cards!

Check post below to see random.org Top 3!

Happy Easter!!  Hope everyone has a wonderful day with their family!
---------------------------------------------

Each week you will be given a challenge to find inspiration in/from what ever the challenge theme is... you can be as literal or abstract in your inspiration as you want....Just make sure you can tie it back to the theme! Challenge closes at 4:00pm Eastern on Saturday.

You will always be able to jump back to the current challenge by clicking the "Current Challenge" link in our sidebar. The rules can always be found by clicking the tab "Challenge Rules" at the top of the page.

You do not need to use the Creative Inspirations Paints in your project, however, if you do, tell us which colors you used, and your name will go in the drawing twice! Each month, one person will win 5 jars of paint in the colors of their choice. The winner will be randomly drawn from all the people who have played that month, so make sure to join in on our challenges each week!

---------------------------------------------

This week's challenge is:

Inspired By: The Rainbow


Here's a card for inspiration:


So let's see your cards inspired by the "rainbow"!  I managed to get all the colors on this card!

Kendra

---------------------------------------------


Eggs Random.org Top 3

Random.org Top 3 from our "Egg" Challenge:

#12 Goldie


#8 Pankti
 

#6 Trisha


Beautiful creations ladies!!

You can grab this badge for your blog:
Congrats! And thanks for playing along with us!!

You each will receive an extra entry into our monthly drawing!

Saturday, April 23, 2011

special treat...

Hello everyone! 

In honor of Easter being tomorrow, I thought I would break from the traditional painting techniques to share a tradition that has been in my family since my grandparents... Traditionally, we do this around Halloween with orange flavored chocolate (that stuff is good!). However, since I have taken over the part of candy maker, I find excuses to make them all year round. =)

These make a really fun gift or party favor!

Chocolate Dipped Marshmallows

What you need:
Chocolate candy melts (I find them in craft stores with cake stuff,)
Microwave safe bowl
Spoon
Toothpicks
Marshmallows (I like the small ones best)
Styrofoam brick
Sprinkles/decorating sugars/chopped nuts (optional)

Step 1: Put candy melts in a microwave safe bowl.

Step 2: Slowly melt your chocolate. The key to this is SLOWLY!  Chocolate burns easily.  I usually do 30 second intervals on half power. Stir in between each interval.

Step 3: Stick your marshmallows onto toothpicks

Step 4: dip into melted chocolate, and pull out... you may need to spin it a little to help extra chocolate drip off.

*Optional step 5: Immediately after removing the marshmallow from the chocolate, dip in sprinkles, sugar, or chopped nuts

Step 6: stick your dipped marshmallows into your styrofoam brick to harden. They should harden at room temperature, but if you want to speed it up, stick them in the freezer for a few minutes. It doesn't take long.

*tip: keep the styrofoam brick... It can be used over and over! It is also great for holding painted brads while they are drying!

Step 7: Remove marshmallows for the toothpicks and enjoy!

now comes the part where I use the Creative Inspirations Paint. =)

to make the tag:
1. Stamp your favorite holiday image with Versamark.
2. Cover with black embossing powder and heat.
3. Paint image with CI paints. These paints are a quick and easy way to add amazing color to your projects! I love the extra festiveness the sparkle of the paint adds. It also matches the shimmer of the sugar coated marshmallows. =)
*I used: Green Olive, Fuchsia, Sky Blue, Tutu Pink, Light Purple, Mellow Yellow, Mango*
4. Die cut your image and a mat.
5. Ink the edges.
6. Glue together.
7. Use an eyelet to make attaching your tag a breeze!

Put your chocolate dipped marshmallows in a decorative container or bag, and attach your tag.
I hope you enjoy this little treat!  Have a wonderful and safe Easter!
~Kassi

Friday, April 22, 2011

your input matters!

Hey everyone!
Just poppin' in to let you all know we have some new polls up in our side bar. Please take the time to vote. The information we get back from you helps us as a company better meet your needs. 

And, if you want to go one step farther, leave a comment on this post telling us your favorite mediums for adding color to your projects (or what you would really love to try).
example: ink, paint, sprays, glitter, markers... 

Thanks!

~Kassi

Thursday, April 21, 2011

Egg-cellent Place Card Holders

This week CI Paints has been inspired by: EGGS
I've been working on my Easter table decor and so today I'm sharing my place card holders. 


The styrofoam eggs have been painted with acrylic paint.  They have the texture of  those beautiful sugar eggs that used to be so popular.  I stamped "For God So Loved The World" on tissue paper and added it to the egg.  For the flowers I punched out 3 layers for each flower, painted them with CI Paints "Green Olive, Rose Quartz, Sea Foam, Sunshine, and then added some bling in the center.  The eggs are sitting on a bottle cap with a ring of beads on pipe cleaners.  I think I have just found a new favorite color. Sea Foam is amazing!  I need to create a project just for that color!

I have to thank my husband for creating the pins for me.  He glued the swirl clips to the corsage pins.

I used a Spellbinders die to cut out the cards and then painted the edges with the same paints as the flowers. These were a lot of fun to create and so simple.  Be sure to  play along with us for a chance to win some of your own "Sea Foam" or whatever color you wish.

Thanks for visiting and have a blessed day!

Wednesday, April 20, 2011

Egg Inspired Gifties:)


Good morning!!  This week's challenge at Creative Inspirations Paint is "EGGS"...so, I thought I would get a few Easter gifties together.  I dug out a few of my inexpensive plastic eggs and decided to give them a facelift by jazzing them up with a few coats of paint.  The first thing I did was lightly sand them...this makes the paint adhere to the egg.  Then, I put on a coating of white acrylic paint...this was done to allow the true color of the paints I selected to shine...you know how bright most of the plastic eggs are.  Once the white paint was dry, I sponged Sapphire on one egg and Peach on the other. When this layer dried, I sponged on Aqua Marine (over the Sapphire) and Rose Quartz (over the Peach). As the eggs were drying, I started working on the cards.


I kept the layouts for both cards VERY simple. Keeping them simple makes it much easier to make quite a few in a short period of time. For the card above, I used Aqua Marine (birdie), Tanzanite (light blue around music notes), Rose Quartz (polka dots on birdie's wing) and Sunshine (around flourishes and the tiny hearts). I love all the sparkle on this card...and since it is going to a little girl, I think she will get a kick out of the sparkle too:)


Now that the eggs were dry, I gathered up some yummy Easter candy and threw them into the freshly painted eggs. Then, I simply threaded grosgrain ribbon through a rhinestone ribbon slide and tied it in a knot. Doing this makes it much easier for the recipient to get to the candy quickly:)


Above is another super, simple card. This sweet image was painted with Rose Quartz (blossom and dots in the butterfly), Sunshine (flourishes and center of the blossom), Aqua Marine (butterfly), Mint, Buttercup and Plum (dots in butterfly). I do hope these are enjoyed! If nothing else, it comes with candy, right? I know one thing, I will definitely be painting more plastic eggs with these awesome paints!! I think they made these eggs look glamorous!!! A huge difference from the eggs I brought home from Wally World...and I got 6 eggs for .97! Sure can't wait until they clearance these out;)

Thank you for dropping by, and don't forget to show us your lovely egg inspired creations in this week's challenge. Have a wonderfully blessed week!!!

HUGS!!
Carolyn

Tuesday, April 19, 2011

Easter Joy

This week the challenge at Creative Inspiration Paints is Inspired by Eggs. I thought that this bunny and his Easter basket full of chicks and a few Easter eggs was so much fun. The stamp is from Cornish Heritage Farms (which is no longer in business). I used my CI paints to color the image. Then I created the background. I used some mesh tape that I have had for eons. I put it over a piece of blue cardstock and then sponged CI paints over the mesh. I started with sky blue and then added touches of tickle me pink, sunshine yellow and winter frost for highlights. I adhered the bunny to the painted background. This I adhered to a purple panel and then to a yellow cardbase. (Yes, it is yellow, even though it scanned orange-ish.) I stamped the sentiment on a piece of pink design paper and glued a fragment tag over the top. I love the shimmer of the image and the cool background. The colors just scream spring!
Barbara Washington - designer

Monday, April 18, 2011

Easter Bunny

I'm a few days early, but want to wish everyone a Happy Easter!  I can't wait to hide some eggs for the kids to look for!

Here's an Easter card I recently created:

I decided I would emboss the left panel and then add some CI Paints with a thin brush to add some shimmer.

What a great way to make your own papers!
I used "Light Purple".

I also used "Sage" to sponge some shimmer on the swirls.

Finished close-up:

Have a great week!